Category Focus/categories/design
Design AI Tools
Discover and compare the best design AI tools and software. Browse 177+ curated tools with reviews and rankings.
Projects tracked
177
Sort mode
RECENT
Page
1
Discover and compare the best design AI tools and software. Browse 177+ curated tools with reviews and rankings.
Projects tracked
177
Sort mode
RECENT
Page
1
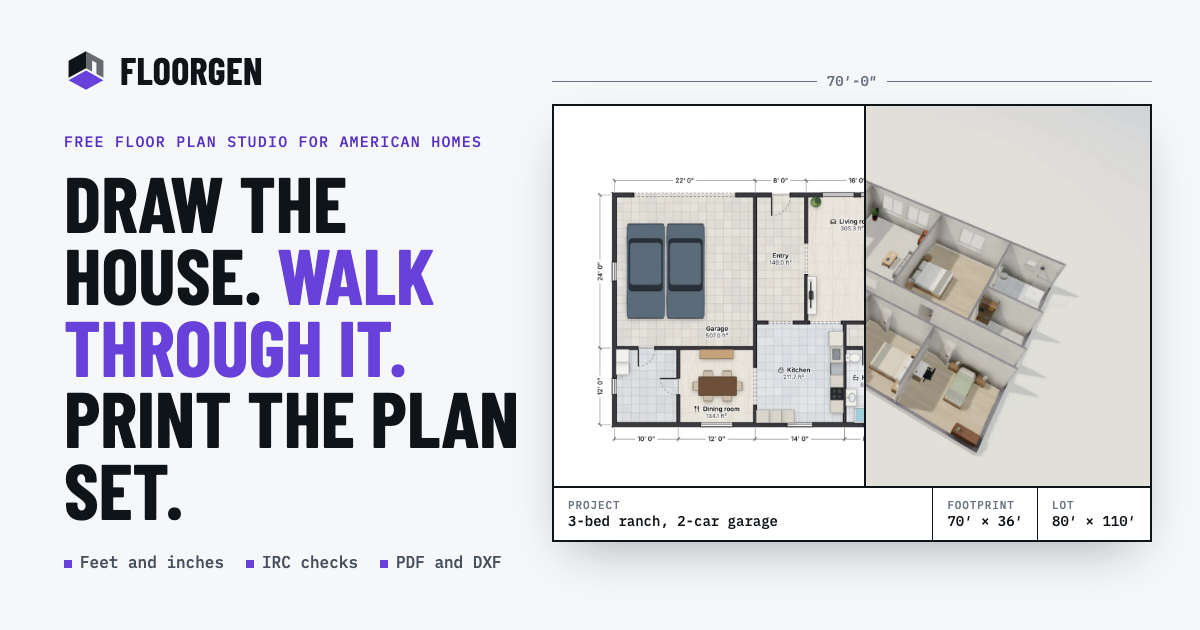
FloorGen is a free floor plan maker that runs in the browser and combines 2D drafting, 3D walkthroughs, video export and code checking in one place. You can describe the space you have in mind and let FloorGen AI draw an editable plan, or draw the plan yourself wall by wall. It is built for homeowners and renters, interior designers and architects, real estate professionals and builders, and people who want an AI assistant to edit their drawings. Every wall, door and sofa in a plan is editable, and every plan is already a 3D model, so you can orbit it, open it as a dollhouse, or walk through it at eye level before anything is built. The problem it addresses is the gap between wanting to change a space and being able to show anyone what that change looks like. Measuring a room, testing where the sofa fits, planning a kitchen or a backyard ADU usually means sketching on paper, guessing at scale, or learning heavyweight drafting software with a licence and an install. FloorGen lets you measure a room, draw it to the inch or the millimetre, and try the sofa in three places before you lift it. There is nothing to install and no account required to draw: plans save in your browser until you choose to sign in. Plans can start from scratch or from existing work. Walls snap and rooms close as you draw, or you can import a photo or PDF of a plan, set the scale by clicking two points a known distance apart, and accept or skip the walls FloorGen suggests. That tracing workflow is semi-automatic, so you check each wall and draw over the image where it misses one. Ready-made plans include houses, ADUs and rooms, such as a 3-bed ranch of about 2,000 ft², a 4-bed two-story of about 2,240 ft², an 800 ft² backyard ADU, a garage-to-studio ADU, an L-shaped kitchen, a 5 × 8 full bath and a 12 × 12 bedroom, each drawn to scale, furnished, and openable in the editor without an account. Furnishing and finishes are handled on the same drawing. About 3,000 models in 14 categories cover kitchens and bathroom fixtures through to cars, workbenches and garage shelving, and each face of a wall can take its own paint while floors take marble, ceramic or wood. Because every plan is already a 3D model, you can orbit it, view it as a dollhouse or walk through at eye level, then record an MP4 walkthrough in 16:9, 9:16 or 1:1 up to 1440p with captions. A view-only HTML file lets anyone open the result without installing anything. Drawings and exports are produced at scale. Plans, elevations and sections sit on sheets from Letter and A4 up to ARCH D and A1, with your client, address and revision in the title block. PDF plan sets include a title block, schedules and a 3D view; PNG images go up to 4,500 px; SVG gives layered vector output; DXF (R12) carries a layer per object type for AutoCAD and other CAD tools and also imports walls, doors and windows as editable objects; glTF exports a 3D model; and MP4 or WebM delivers the walkthrough video. FloorGen states clearly that there is no DWG or IFC export and no photoreal rendering. Code checking runs as you edit. You pick a profile, including IRC (US), NBC (Canada), OBC (Ontario), the UK Approved Documents, DIN (Germany), CDMX (Mexico City) or a generic set, and each issue names the room, the rule and what it needs, with a numbered marker on the plan that you can mark as handled. The checks cover habitable room size and width (IRC: at least 70 ft² and 7′ across), stairs including risers, treads, width, headroom, handrails and guards with IRC limits of 7¾″ risers, 10″ treads and 6′-8″ headroom, net and gross area per room and floor in ft² or m², and schedules for doors, windows, finishes and furniture with unit rates for a budget. FloorGen describes itself as a design aid, not a permit approval, and advises confirming with your building department. AI is available in two forms with the same tools and the same undo. Sign in and press Ctrl+I on any plan to use the built-in FloorGen AI, typing what you want or dropping in a photo of a sketch; every change appears as a step with its own Undo. Alternatively, connect the assistant you already use, including Claude, ChatGPT, Cursor, Claude Code, Claude Desktop, claude.ai, VS Code with Copilot, Windsurf, Codex CLI, Gemini CLI or Cline, over MCP. The MCP server exposes 150 tools, 15 resources and 12 prompts that read and change the real drawing rather than a picture of it, so areas and checks stay correct. Keys are scoped to read, edit or full access per project with an expiry, while dry runs, a restorable trash and a checkpoint before big changes add safety, and deleted projects can be restored for 30 days. Everything works on one drawing, which is the core of the approach: change a wall and the areas, the 3D model, the code checks and the printed sheets follow. The workflow runs from drawing or tracing, to furnishing and checking, to walking the plan in 3D, to exporting or printing a plan set. Metric and imperial units are both supported, with feet and inches to 1/16″ or metric to 1 mm, and areas shown in ft², m² or sq yd. For homeowners and renters that means trying a layout before moving anything, planning a kitchen, bathroom or backyard ADU, and handing a contractor a drawing to scale instead of a sketch. For interior designers and architects it means furnishing from the model library, giving walls individual finishes, presenting in 3D or on video, and producing elevations, sections and print sets. For real estate and builders it means tracing plans from a photo or PDF, getting room areas and a budget for paint, flooring, tile, doors and windows, and sending a view-only HTML file or a walkthrough video. Concrete workflows described on the site include tracing a plan from a photo or PDF and setting the scale with two points, furnishing a bedroom or kitchen and reviewing numbered issues room by room, walking a four-bed two-story template in 3D, and printing an 800 ft² ADU plan. The AI workflow is equally concrete: ask an assistant to widen the kitchen by 2 ft, add a window over the sink, then check the rooms against the IRC, and watch each change land as an undoable step. There is also a direction for education, for teaching how plans work. Target users are listed explicitly: homeowners and renters, interior designers and architects, real estate and builders, AI users, and education. It runs in the browser on phones, tablets and desktops with nothing to install, though a bigger screen is easier for detailed drafting. Pricing is $0: the editor in metric or imperial, furnished 3D with walk-through and video, code checks and schedules, PDF, PNG, DXF and glTF exports, and the AI assistant connection are all free, with no trial, no card and no watermark. Signing in, also free, is what unlocks exports and adds cloud sync and the AI chat in the editor. FloorGen's value proposition is straightforward: a free, browser-based way to draw or describe a floor plan, see it furnished in 3D, check it against building code guidance and export a scaled drawing set, all without installing software, paying for a licence, or creating an account just to start.
Maildun for Mac is an agentic email builder for macOS, released as a free beta. It is part of the Maildun family of email tools: the open source Maildun platform, described on the website as the full email marketing stack for campaigns, sequences and transactional email; Maildun for Mac, a native Mac application for designing emails; and Maildun Platform, a managed version listed as coming soon with the promise "We run it, you send." The home page summarises the whole offering as "Campaigns, sequences, and transactional email. Run it yourself, design on your Mac, or let us host it for you." The Mac app is built for people who want to produce on-brand emails either by hand, with an AI assistant, or over MCP, and it is free to download. Maildun is positioned as email marketing tooling "built in the open." The open source edition is described as the full email marketing stack that you can self-host, read the code of, and help shape, and the site notes it is free to self-host. Rather than pushing teams toward a single closed hosted product, Maildun offers three ways to run the same idea: hosting it yourself, designing on your Mac, or letting the vendor host it for you through the forthcoming Maildun Platform. This matters because email remains a core channel for campaigns, automated sequences and transactional messages, and teams often want control over where their sending stack and their design workflow live. The Mac app gives designers a native place to build those emails, while the open source project and the upcoming managed platform offer a path to actually sending them. Designing by hand is the foundation of Maildun for Mac. The app provides a drag-and-drop editor in which you build an email by adding elements such as a heading and body text, as shown in the product's editor screenshot with the prompt "Write something people want to read." The editor exposes three views — Design, Preview and Code — so you can lay out the email visually, check how it will render, and inspect or edit the underlying code. An "Apply brand" action sits alongside the assistant and an export control in the toolbar. The result is a hands-on workflow in which the person designing the email keeps direct control over layout and copy rather than relying purely on generated output. The AI assistant takes that hand-built design and edits it live. Maildun for Mac lets you connect Claude, ChatGPT, Gemini or Grok using your own API key, so the model you already use can work directly on the email you are building. Critically, the assistant's changes are presented as a proposal that you accept or reject, rather than being applied silently to your design. That review step keeps a human in the loop: you can see what the assistant wants to change, approve it if it improves the email, or discard it and keep your original version. Bringing your own API key also means the choice of model provider stays with you, and the app supports several of the major assistants by name. Beyond the in-app assistant, Maildun for Mac ships with a built-in MCP server. Turning it on allows developer-facing AI coding tools — Claude Code, Codex and Cursor are the ones named — to create and edit emails as well. MCP, the Model Context Protocol, is the mechanism through which those tools talk to the app, and having the server built in means there is nothing extra to install beyond enabling it. This opens a second, more technical route into email production: instead of pointing and clicking in the editor, a developer or power user can ask an agent inside their coding environment to generate or adjust an email, with the resulting changes landing in the Mac app's design. Maildun for Mac also adds organisational features around the design itself. Workspaces per client let an agency or freelancer keep each client's emails separate, so one client's work does not bleed into another's. Brand kits carry shadcn-style component styles, and the "Apply brand" action brings those styles to a design, which helps keep every email visually consistent with the brand it represents. For repeatable layouts, saved sections let you store blocks you use often and drop them into new emails rather than rebuilding them each time. Media can be stored on your own Cloudflare R2 or Amazon S3 bucket, giving you control over where images and other assets live. And when an email is finished, it can be published to maildun.com. The overall approach is summed up in the Product Hunt tagline: "Design on-brand emails by hand, with AI, or over MCP." Maildun for Mac deliberately supports three ways of working on the same design rather than forcing a single path. You can build everything yourself in the drag-and-drop editor; you can hand an existing design to Claude, ChatGPT, Gemini or Grok and let the assistant propose edits; or you can enable the built-in MCP server and let Claude Code, Codex or Cursor create and edit emails through an agent. Whichever route you take, the app remains the place where the email lives, and the assistant's edits always arrive as proposals you accept or reject. Underneath, the wider Maildun project is open source and positioned as something you can self-host, read the code of, and help shape. The stated benefits follow from that mix of control and assistance. Because the Mac app is free and the open source platform is free to self-host, teams can adopt Maildun without a licence fee, and because the project is built in the open they can read the code and help shape it. Designing by hand keeps full control over the output, while the AI assistant speeds up changes without removing the designer from the loop — every suggestion is accepted or rejected rather than applied automatically. Support for MCP means the same email work can be driven from the AI coding tools many developers already use. Brand kits and saved sections reduce repeated work and help maintain consistency across emails, and media storage on your own R2 or S3 bucket keeps assets under your control. Concrete uses described in the material include building a marketing email by hand in the editor — adding a heading, writing body copy, and checking the result in Preview or Code view. Teams running campaigns, automated sequences and transactional email can use the wider Maildun stack for sending, with the open source edition self-hosted or the managed Maildun Platform used once it is available. Agencies and freelancers can organise work by client using workspaces and apply each client's brand kit so their emails look on-brand. Designers who want a faster first draft can ask the AI assistant to edit the design and then accept or reject its proposals. Developers can enable the MCP server and create or edit emails from Claude Code, Codex or Cursor, and finished emails can be published to maildun.com. Maildun for Mac is aimed at people who design emails — in-house marketers and designers, and agencies or freelancers working across multiple clients — as well as developers who want to generate emails from their coding tools. It runs on macOS as a native application and is free. The wider Maildun project is open source and free to self-host, with source code available on GitHub and a managed Maildun Platform listed as coming soon. Named integrations and connections include Claude, ChatGPT, Gemini and Grok for the AI assistant; Claude Code, Codex and Cursor through the built-in MCP server; Cloudflare R2 and Amazon S3 for media storage; and publishing to maildun.com. The Mac app is labelled beta, and Maildun itself is labelled open source beta. Maildun for Mac packages an on-brand email builder, a bring-your-own-key AI assistant and a built-in MCP server into a single free Mac app, and connects it to an open source email marketing stack you can self-host. Its core promise is choice: design by hand, with AI, or over MCP, while keeping the final say over every change.
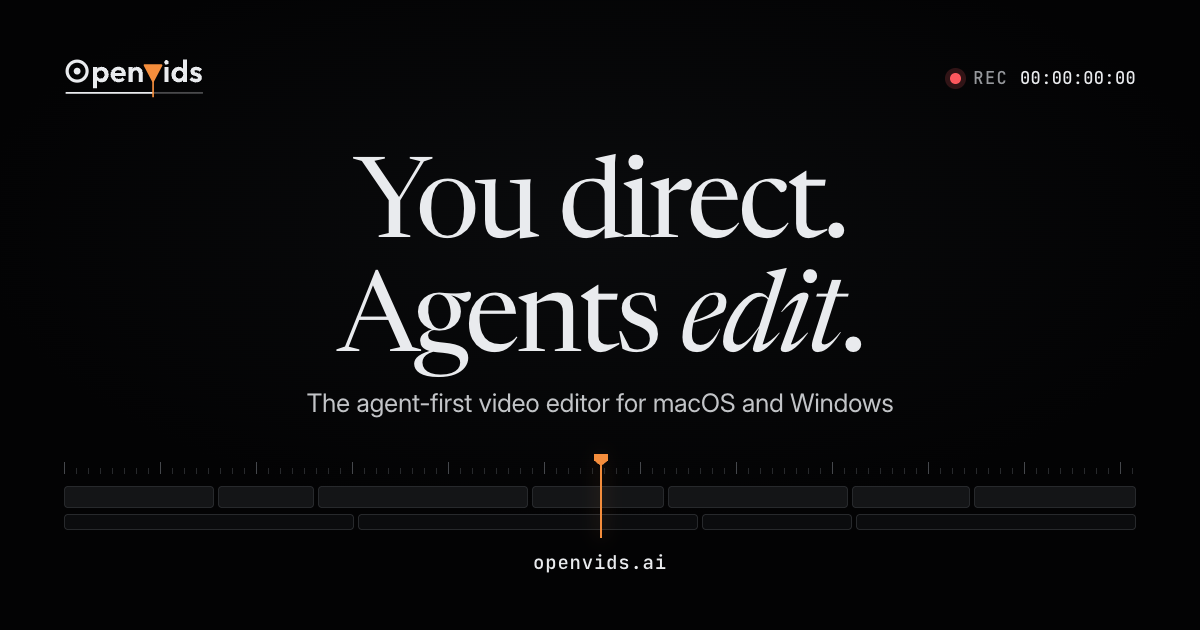
OpenVids is an open-source, agent-first AI video editor for macOS and Windows. Instead of assembling a film by dragging clips onto a timeline from the first frame, you describe the film you want and AI agents do the assembly work: they build the chapters, cut the timeline, add motion and sound, and review the render. The product is described on its own site as free and open source, and it is distributed as a downloadable desktop application with a build for Apple Silicon Macs and a build for Windows, alongside a public source repository on GitHub. Its stated premise is simple: you direct, and the agents edit. The problem OpenVids sets out to solve is stated directly on the site: "Every project starts with a story. Then the timeline grows faster than the story does." As the page puts it, you lose the thread somewhere around clip two hundred — the story that was clear at the start becomes buried under the growing volume of clips, cuts and edits required to finish it. The team behind OpenVids says they wanted the story to stay visible the whole way through, and that goal shapes the structure of the editor rather than being an afterthought. Instead of treating the timeline as the only source of truth, the product keeps the story itself visible as a first-class part of the project. The central capability is agent-driven editing by description. The site's own summary of the product is that you describe the film, and agents build the chapters, cut the timeline, add motion and sound, and review the render. This means the first pass at an edit is generated from a description of the film rather than from manual clip placement. The agents act on the project in more than one dimension: they organise content into chapters, perform the cuts that make up the timeline, generate motion elements, add sound, and then review the rendered output. The writing on the page frames this as "You direct. Agents edit." — direction is the human contribution, and the mechanical editing work is delegated. Chapters and story structure are kept explicit in the product. The landing experience itself is built as a chaptered film, listing segments such as Cold open, The problem, Meet OpenVids, Feature tour, In the field and Outro, each with its own timecode. The same idea appears in the navigation as a Story Graph area, which sits alongside Media and Edit rather than being hidden inside them. Because the story is represented as named chapters with timecodes, it stays legible even as the number of clips grows — which is precisely the thing the site says a conventional timeline makes difficult. Crucially, agent output is not a black box you are locked out of. OpenVids states that "every change lands on a timeline you can take over." So the agents' edits are recorded as real timeline changes that a human editor can subsequently pick up and modify directly. This is what separates an agent-first editor from a one-shot generative tool: the result of the agents' work is an editable project, and the site's feature tour describes showing the workspaces as one continuous workflow, implying that moving between agent-generated structure and hands-on editing is not a separate mode but part of the same flow. Motion and sound are handled as distinct concerns with their own place in the interface. The navigation lists Motion and Sound as separate areas, and the agent summary explicitly includes adding motion and sound to the timeline. The landing page illustrates this with media entries such as Title_Reveal.motion, a motion asset shown with its own duration, indicating that motion elements are tracked as items in the project just as footage is. Treating motion and sound as first-class, agent-addressable parts of the project is what allows a description of the film to result in something that is not merely cut but finished — with titles, movement and an audio layer rather than picture alone. Review and rendering close the loop. The site says the agents review the render, and Render is listed as its own area in the interface alongside Edit and Sound. The page also lists Licenses as a top-level area, and the demo project is annotated with a version marker (V1), a frame rate (24 FPS), a resolution (3840 × 2160) and the descriptors RESEARCH, OPEN MOVIES and CC BY. The landing page's imagery is drawn from open movies including Sintel, Big Buck Bunny and Tears of Steel from the Blender Foundation, shown under CC BY. Media management is visible too: a Media panel in the demo reports a count of 23 assets, with 1 missing. Overall, OpenVids works by inverting the usual relationship between description and timeline. Rather than beginning with an empty timeline and building a story clip by clip, you start with a description of the film; agents translate that description into chapters, cuts, motion and sound; the result is reviewed and rendered; and every one of those changes is written onto a timeline that remains yours to take over. The unique approach, as the site frames it, is being agent-first: agents are the primary operators of the edit, and the human's role is direction — deciding what the film is, with the option to step in and edit the timeline directly at any point. The stated benefit follows from that approach. If the story stays visible the whole way through, you are less likely to lose the thread as the project grows — the failure mode the site describes around clip two hundred. Because agent edits land on a takeable-over timeline, you get the speed of delegating assembly without giving up control of the final cut: you can direct, let the agents build and revise, and then take over the parts you care about. And because the product is free and open source, the editor itself, not just its output, is something users can download, inspect and build on. In practical terms, the workflow the site describes plays out as follows. You begin a project with a description of the film you want to make. Agents build the chapter structure — something like a cold open, the problem, an introduction, a feature tour, a field section and an outro — and cut the timeline accordingly. Motion elements such as a title reveal are added, and sound is layered in. The render is produced and reviewed, and the whole thing arrives on a timeline you can take over, with the project's media assets tracked in one place. From there you can keep directing further revisions, or edit the timeline directly. OpenVids is built for macOS and Windows. The site offers a direct download for macOS on Apple Silicon (the .dmg build labelled v0.5.4) and a Windows build (the x64 setup executable, also labelled v0.5.4), plus a link to view the source on GitHub. The product is described as free and open source, and no paid tier is described on the page — the emphasis is on the download and the repository rather than on plans or subscriptions. The interface organises the work into named areas including Agents, Media, Story Graph, Edit, Motion, Sound, Render and Licenses. You direct; the agents edit. That single line captures what OpenVids is: an agent-first, open-source video editor that turns a description of a film into chapters, cuts, motion, sound and a reviewed render — all landing on a timeline that stays under your control, so the story remains visible from the first clip to the last.
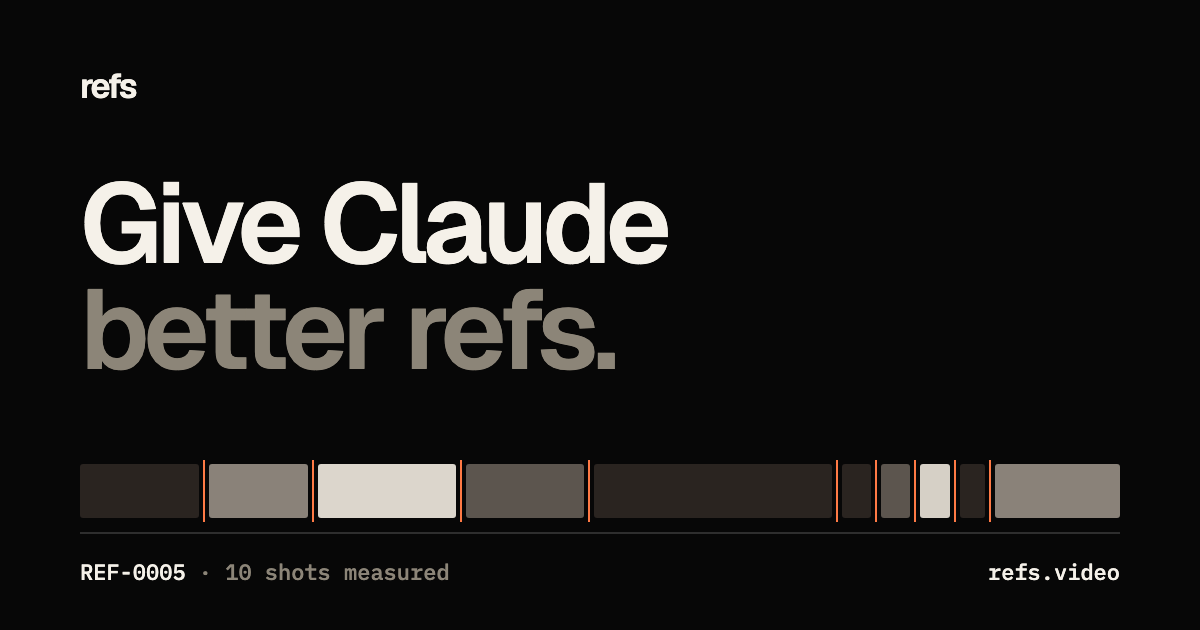
Refs is a video reference library built for AI agents and the people who direct them. It gathers 3,032 films — launch films, motion pieces and explainers that moved people — and turns each one into measured analysis an agent can actually use. Instead of a mood board of links, Refs publishes cut-by-cut measurements, a 15-plate blueprint and a runnable prompt recipe for every film, so tools like Claude Code, Codex and Cursor can study what already worked and plan a new film from real references. Browsing is free, and the library is designed for marketers, motion designers, founders and developers who want their agent to plan a launch film from the real thing rather than from a vague description. Every creative brief runs into the same wall: language is a poor way to describe motion. Telling an agent to make a punchy 15-second launch film leaves out the timing, the shot lengths, the cuts per minute, the type treatment and the sound, so the model fills the gaps with guesses. Refs starts from the premise stated on its own homepage — Claude is only as good as the references you give it. By measuring successful films frame by frame and writing the findings down as structured plates and prompts, Refs gives an agent something concrete to reason from. The result is that Claude copies the method of a film that worked, never the footage, which keeps the output original while grounding it in evidence rather than vibes. The core of Refs is a measured archive. Each film in the library is broken down shot by shot, with shot boundaries found frame by frame so you can click any shot and jump straight to it. Every entry carries its own numbers: a shot index such as 01 / 10, cuts per minute (for example 36), and average shot length (for example 1.5 seconds). A cut map runs beneath the player, and you can hover a film to play it or move across it to scrub through its cuts; on a phone you simply tap. Scrub-anywhere playback makes it possible to compare pacing across many films quickly, and search runs across the whole archive, so you can pull up every film studied from a given company or explore by keyword. Beyond measurement, each film is written up as a 15-plate blueprint — a structured document of what the film does and how it does it. The plates cover hook, beats, shots, type, colour, sound and script. Specific plates named on the site include Format, which describes what the film is in one breath; Card, which gives length, pace, shots and sound at a glance; Hook, which breaks the first two seconds down frame by frame; and a final plate titled Make it yours, which shows how to swap the story but keep the method. The blueprint is a flip-through deck rather than a static report, with 15 plates per film, so an agent or a designer can walk from the hook to the edit in a defined sequence and see the decisions in the order they were made. Refs also groups films by format and publishes formulas: the patterns that the strong films of one format share. Named formulas in the library include The Price of Regret, The Music-Led Motion Showreel, The Dark Staged Product Reveal, The Live-Drawn Paradox, The Fifteen-Second Service Rescue, The Sonified Chart Relay and The Capability Proof Montage. Each formula is backed by a set of films — the site lists, for example, eight films under the dark staged product reveal, ten under the music-led motion showreel and seven under the live-drawn paradox. In total Refs reports 28 formulas across the archive, which gives an agent a way to reason about a whole format rather than a single example. Every film also comes with a prompt recipe that Claude can run. The recipes are written as concrete, executable instructions rather than descriptions. One example published on the site opens: Use Remotion to create an original 15-second, 60 fps motion-design showreel for {{PRODUCT}}, then lists timed beats — 0–1.9 s a point grows into the mark inside faint circular guides; 1.9–3.4 a full-screen shape wipe reveals a huge product title; 3.4–5.6 a warm-ivory process chart — and continues through the piece. Because the recipe is parameterised with placeholders such as {{PRODUCT}}, the structure travels to your own product while the timing and craft stay intact. You paste the recipe into Claude Code and make it yours. Refs connects to an agent through an MCP server. One command adds it: claude mcp add --transport http refs https://refs.video/mcp --header "Authorization: Bearer $REFS_KEY". The site notes that the same integration works with Claude Code, Codex and Cursor. Once connected, the agent has a search tool — the transcript on the homepage shows refs.search_videos being called with queries such as founder launch, kinetic type, silent demo, three.js and terminal — and can pull blueprints and formulas back into its context. As the FAQ puts it, Claude can then search the archive, pull blueprints and formulas, and plan your film from real references. That is the whole workflow: ask for a film, let the agent study what already worked, then build. The distinctive move is that Refs does not host the videos. Every film plays from its original post and stays its maker's; Refs publishes only its own measurements and analysis, and credits and links every source. That keeps the library respectful of the original work while still letting an agent study it, and it also means the blueprint teaches method rather than footage — as the site says, Claude copies the method, never the footage. In practice that produces original work grounded in evidence: instead of a generic AI video, you get a plan shaped by timed beats, measured pacing and structural plates drawn from films that demonstrably reached an audience. The most obvious use case is a launch film. A team asks Claude for a launch video, the agent searches Refs for founder-led launches or dark staged product reveals, reads the matching blueprints and formulas, and returns a plan with timed beats and a prompt recipe that can be built in a tool like Remotion. Other workflows follow the same shape: planning a motion design showreel, structuring an explainer, building a 15-second service rescue spot, or reverse-engineering why a competitor's teaser feels fast. Because browsing is free, designers also use the archive directly — scrubbing films, reading cut maps and comparing cuts per minute — to learn pacing by eye before they ever open an editor. Refs is aimed at people who plan and produce films with AI: founders and marketing teams making launch videos, motion designers and editors studying pacing, and developers who already work inside Claude Code, Codex or Cursor. The archive is free to browse forever and includes every film playable from its source, cut maps, hover-scrub, the numbers behind each film, the first plates of every blueprint and full archive search. Pro is $10 a month billed yearly, or $16 monthly, and opens all 15 plates of every blueprint, a runnable recipe for every film, formulas across films of one format, and the Refs MCP for Claude Code, Codex and Cursor with 1,500 credits a month. A Product Hunt launch code, PRODUCTHUNT, takes 50% off a year of Pro. The takeaway is simple: agents write better films when they are given better references, and Refs is the reference library built for exactly that. It packages 3,032 films, 67,695 measured shots and 28 formulas into blueprints and prompt recipes an agent can search and run, so make me a launch film becomes a plan drawn from work that already moved people. Same Claude — better references.
TractionWave is an attention analytics product for advertising and marketing creative. It predicts where attention lands on your ads, thumbnails, and campaign visuals, returning an AI attention heatmap together with ranked hotspots described in plain language. The product is built for the people who make and approve creative — designers, marketers, and agencies — and its stated purpose is simple: test the creative before you spend the budget. TractionWave runs on the web, where you can upload an image and see a result with no account needed, and it also runs inside Figma through a plugin, with a Canva app described as coming soon to the Canva Apps Marketplace. A video workflow and an MCP server extend the same attention prediction to video ads and to AI agents. The problem it addresses is stated plainly on the site: media budgets buy impressions, and attention is not included. Most creative goes live untested, and the usual feedback is an A/B test or falling click-through — both of which arrive afterward, with your money already spent. The alternatives TractionWave sets itself against are a two-week eye-tracking study or a burned A/B budget. TractionWave tells you before instead of after. It is positioned to catch buried calls to action, weak hierarchy and competing focal points while the design is still being edited, so those issues can be fixed before a single impression is bought. The core of the product is the creative evaluation. You upload a static visual as a PNG or JPG — dropping it in or pasting from the clipboard — and TractionWave returns a predicted attention heatmap shown against the original so the two can be compared side by side. Alongside the heatmap you get ranked hotspots, presented in plain language rather than raw data. The tool is described as working on any static visual, including display and social ads, thumbnails, posts, banners, posters, and slides. Once the result is in, the heatmap can be dropped onto the canvas as a layer, which lets you compare versions of a design or show the predicted attention result to your team or a client without leaving the file you are working in. TractionWave is delivered as integrations inside Canva and Figma, so the attention check happens in the editor where the creative is made. In Figma, you connect the TractionWave account from a plugin found under Plugins in Actions, then select frames — or select none to use every frame on the page — and run them. In Canva, you open Apps in the side panel, search for TractionWave, connect your account, pick a page and run it. Each Figma frame or Canva page costs 1 credit, and failed runs are refunded. The workflow is deliberately free of exports, uploads and tab switching: pick the Canva page or Figma frame and send it. One account carries one balance, so Canva and Figma runs spend the same credits as the web app, and every result lands in your workspace history. For video ads, TractionWave returns a heatmap video rather than a slideshow. Attention is blended smoothly from second to second over the full-frame-rate original, and the result is ready to download and share. Ranked hotspots are provided for every second on a timeline, so you can see when the logo, the offer and the CTA actually get looked at across the duration of the ad. This turns video creative review into a second-by-second check rather than a single overall impression of whether the ad is working. The MCP server gives AI agents what the site calls eyes for attention. You connect TractionWave to Claude, Cursor, VS Code or any MCP client by pasting the server URL at https://compute.tractionwave.com/mcp and signing in. A single tool, predict_attention, lets your agent send a screenshot or design and get ranked hotspots plus a heatmap back, so it can check a layout before it ships. Sign-in uses OAuth — no API keys — with your client opening a TractionWave consent page the first time and refreshing its own tokens afterward. Every connected agent is listed in your workspace with when it was last used, and disconnecting one stops its access immediately. Overall the product follows a three-step method. First, open the panel in Canva or Figma while you are editing the ad, post or campaign visual. Second, run the analysis with one click, which sends the current page or frame for evaluation. Third, read the heat: a predicted attention heatmap plus ranked hotspots in plain language, which you can drop onto the canvas as a layer. Under the hood, a diffusion model trained on interaction data predicts where attention lands on your creative, delivering eye-tracking-style insight in seconds instead of recruiting a panel or waiting weeks for a study. The benefits follow directly from that speed and placement. You can protect the spend by finding out whether the CTA, offer and logo actually get seen before a single impression is bought. You get evidence in seconds rather than a two-week eye-tracking study or a burned A/B budget. And you avoid adding new tools, because it runs inside Canva and Figma where the creative is made — analyze, adjust, re-run, publish. TractionWave also states that your image is used only to generate your analysis, that designs are never used to train or improve any model, that your work stays yours, and that deleting your account removes it permanently. Use cases follow the creative formats the product supports. Marketers can pretest display and social ads, thumbnails, posts, banners, posters and slides before committing budget. Designers can compare versions by dropping the heatmap onto the canvas as a layer and presenting that comparison to a team or client. Video teams can review per-second hotspots to confirm the moments a logo, offer or CTA is actually looked at. Teams using AI agents can have an MCP client call predict_attention on a screenshot or design so a layout is checked before it ships. Agencies running volume can work across many client visuals using the same credit balance and workspace history. TractionWave is aimed at designers working in Figma and Canva, marketers responsible for media budgets, teams shipping creative every week, agencies running volume, and AI agent users. Integrations include the Figma plugin on Figma Community, the Canva app listed as coming soon to the Canva Apps Marketplace, and MCP clients such as Claude Code, Claude app, Cursor and VS Code. Pricing is pay-per-evaluation with no subscription: 1 credit equals 1 evaluated visual. The free tier offers 2 evaluations — 1 watermarked with no account needed and 1 more, watermark-free, when you sign up. Starter is $18 for 10 credits ($2 per credit), Growth is $95 for 100 credits ($1 per credit) with priority processing and 5 images on us, and Scale is $185 for 400 credits ($0.50 per credit) with priority processing and 30 images on us. Paid packs include full-resolution, watermark-free output, and credits never expire. TractionWave's value proposition is narrow and clear: media budgets buy impressions but not attention, so the attention check belongs before the spend, not after. By predicting where people will look with a heatmap and ranked hotspots, and by delivering that prediction inside Figma, Canva and AI agent workflows, it lets you catch buried CTAs, weak hierarchy and competing focal points while the creative is still editable — and pay only for the evaluations you use.
Redlamp is a native, open-source RAW photo editor for Apple Silicon Macs, built from scratch in Swift and Metal. According to its website, it keeps "Lightroom's workflow" — the panels, slider names, ranges and keyboard shortcuts photographers already know — while rebuilding everything underneath as a native, GPU-first application. It describes itself as an editor, not a catalog: it opens folders of photos and keeps your edits in small sidecar files right next to them, and it never touches your originals. It runs on macOS 26, is currently at pre-alpha version 0.2.6, and the site states that the Mac editor comes first, with iPad and iPhone to follow from the same platform-neutral engine. The website explains the motivation behind the project directly: Lightroom defined how millions of photographers edit, but it is described as "a cross-platform application that doesn't feel at home on a Mac," and one that is tied to a subscription and a cloud. Redlamp's name comes from the darkroom safelight — "the one light you can work by without fogging the paper" — a way of saying you can see and shape your photo freely while the original is never harmed. Redlamp is licensed MPL-2.0, described as compatible with the App Store, and the site says its algorithms are implemented clean-room from published papers. It is free, with no subscription, and support is offered through Ko-fi. The Develop module is presented as "Lightroom's workflow, at home on the Mac." The site says the layout, panel order, slider names, ranges and defaults, and single-key shortcuts all carry over, so there is nothing to relearn, while everything underneath is rebuilt as a native, GPU-first app. Panels listed include Basic, Tone Curve, Color Mixer, Color Grading, Detail and Effects. The site states that Lightroom Classic's shortcuts are implemented as 83 actions on 87 key bindings, that you can find an adjustment (⌘F) by name or by the words people use, and that before and after is available in three layouts, cached so edits never re-render it. Sliders can be clicked to jump, dragged to adjust, Shift-dragged for fine control and double-clicked to reset; clicking the value lets you type one in or drag to scrub. Double-clicking a panel title resets it, and Option-clicking a header turns on Solo Mode. The histogram shows clipping indicators and you can drag across it to adjust Blacks, Shadows, Exposure, Highlights or Whites. The command palette is a central part of the workflow described on the site. ⌘K opens one search for every action, every Develop slider and every picker, and choosing a slider or a picker does not close the palette — it turns into that control, over the photo. ⌘F searches the sliders alone. Pressing Enter on a slider shrinks the palette to a slider bar over the photo; the arrow keys step the value, Shift moves ten times as far and Option moves finer, up and down move to the next slider, and a run of presses counts as one history step. Moving through a picker previews each choice on the photo, Enter applies it, and Esc goes back one level. You can also type a value directly, such as "exposure 0.7" or "temp 5600k", or type something like "x+0.3" in the slider bar. A hint bar always shows the keys that work right now. Responsiveness is framed as a core design principle. The site states that rendering and UI are strictly separated, so the UI never waits on the engine, the disk or the GPU. One fused Metal kernel applies every adjustment, frames arrive as IOSurfaces without a copy, and rendering never waits on the main thread. The site reports interactive renders at Fit in 0.6 to 3 ms on Apple Silicon, a full 26 MP frame at 1:1 in about 13 ms, a full-resolution export render in 45 ms, and opening a raw file in 70–250 ms, all measured on an Apple M1 Ultra with a Release build. Latest-wins scheduling collapses a burst of slider events to the newest, and a full mip pyramid means every zoom level samples the right resolution. Masking is described as "part of the architecture, not an afterthought." Every edit is a layer with its own adjustments plus a mask built from components that add, subtract and intersect, each of which can be inverted. Components include linear and radial gradients drawn directly on the photo, a brush with A and B brushes and Erase, Size, Feather, Flow, Density and Auto Mask plus pen pressure, and Luminance Range and Color Range selections that follow the photo's global edit. AI masks cover Subject, Background, People (including parts such as face skin, eyebrows, eye sclera, iris, lips, teeth and hair) and Sky using Apple Vision's built-in models, with nothing to download. Objects can be selected by hovering to preview and then clicking, dragging a box or brushing, using Segment Anything 2.1; Depth Range comes from a photo's own depth map or an estimated depth map; and Landscape masks cover water, vegetation, mountains, architecture, ground and snow. Mask presets such as Blue Sky, Brighten Subject, Darken Background, Smooth Skin, Whiten Teeth and Pop Eyes compute their masks for each photo. The site says masks are evaluated per pixel inside the same GPU kernel, so up to 16 of them cost well under a millisecond extra at Fit, and that every model runs on the Mac, with photos never uploaded. Colour handling is described as "serious colour science, scene-referred from the start." The pipeline is linear and scene-referred, with a camera white-balance model using Robertson's method and the camera's matrix. The Color Mixer works in OKLCh so hues move the way the eye expects, and some looks are measured against cameras' own renderings — the site notes that Standard v3 sits within ΔE 3.26 of the camera's Provia. Other colour tools include 3-way and individual colour-grading wheels with Blending and Balance, which also tint B&W images for split-toning, and parametric and point tone curves. Treatment switches between Colour and B&W, and Base Looks come with an Amount slider from 0 to 200 plus a browser that renders every look on the photo; six built-in looks and 15 film-style looks built on 3D look tables are listed. In the Detail panel, noise reduction is described as knowing your camera's noise. It scales to each photo's own noise, read from the DNG NoiseProfile tag, otherwise from the camera's calibrated profile at its ISO, otherwise measured from the raw data when the file opens. Luminance and Color controls are provided with Lightroom's controls, and luminance keeps fine texture through wavelet shrinkage and a non-local-means pass in exports. Sharpening is noise-aware: detail is measured on a denoised copy and applied to the untouched image, so grain passes through instead of being sharpened, and Detail moves from an unsharp mask towards Richardson–Lucy deconvolution. Texture, Clarity and Dehaze work globally and inside masks, and highlight reconstruction rebuilds clipped photosites. Recipes bring presets, profiles and LUTs into one open format. One format holds presets, profiles (a recipe's Base Look) and LUTs, and the site says you can type in a Fujifilm-style camera recipe card exactly as it is written. There are 39 bundled recipes in eight groups with hover to preview, import and export of .redrecipe, .cube, .3dl and HaldCLUT files, camera controls for Dynamic Range, Color Chrome and white-balance shift, and a Recipe Lab that checks every look across a 40-image set. Lightroom develop presets (.xmp) can also be imported, with a report of what came across exactly, approximately or not at all. Redlamp uses its own RAW pipeline. LibRaw only unpacks the file; black levels, white balance, demosaicing and colour all happen in Redlamp, on the GPU. The site lists Menon demosaic for Bayer sensors, Markesteijn's X-Trans demosaic, hot-pixel repair before demosaicing, row and column banding correction measured in the sensor's masked margins, and DNG gain maps applied before demosaicing. It states support for Sony ARW, Canon CR3, Nikon NEF, Fujifilm RAF, Apple ProRAW and Pixel DNG, plus JPEG, HEIC, TIFF and PNG. Edits are saved to a small sidecar next to each photo, and the original stays exactly as you shot it. Focus stacking is a separate Stack workspace. Redlamp spots a focus bracket in your folder and offers to merge it with a merge banner. Frames are stacked as demosaiced camera RGB before any edit, so every Develop slider still works on the result, and you can retouch from any frame. Stacks are detected for you, with Auto, Smooth and Detail strategies and a depth map, and the site reports that 25 Canon CR3 frames merge in about 8 seconds. A command-line tool, redlamp stack, does the same from the terminal. The workspace follows a Lightroom-style layout: Navigator, Folders, Recipes, Snapshots and History on the left, the photo with a filmstrip below in the centre, and the histogram, tool strip and Develop panels on the right. Folders are remembered by bookmark, shown as a tree with the number of photos in each, and nothing on disk is moved or changed — the filmstrip follows the disk by itself. The site says Redlamp is built to stay fast with any number of photos: a folder lists without reading a single sidecar, thumbnails decode in parallel on every core, memory is kept within a 128 MB budget and cached on disk in one file per folder, and the filmstrip is built so 50,000 photos cost what a screenful does. The benefits described are practical: photographers keep a workflow they already know, with the same panel layout, slider names and ranges and keyboard shortcuts, while gaining a native, GPU-first app where every slider lands within a frame and the UI never waits on the engine. Because edits are stored in sidecar files next to photos rather than in a catalog or the cloud, the described outcome is that you can see and shape your photo freely and the original is never harmed. On-device AI and optional downloadable models mean photos are never uploaded. Concrete scenarios where the product is used, as shown on the site, include editing RAW files from cameras such as a Sony α7R V, Nikon Z 6, Fujifilm X-T3 X-Trans, Canon EOS R6 and iPhone 12 Pro ProRAW; applying masks such as a linear gradient to darken and cool a sky while a feathered radial gradient warms trees; splitting tones with the colour-grading wheels; working at 1:1 with the Detail panel on a Canon EOS R6 CR3; applying camera-style recipes to Fujifilm raw files; and merging a focus bracket of 25 Canon CR3 frames into a single developing result. Redlamp is aimed at photographers who edit RAW files on a Mac and want the Lightroom workflow without a subscription or a cloud, and at users on Apple Silicon running macOS 26 — the site notes it is a pre-alpha release. It is free, with no subscription, and supported via Ko-fi, so it can also be downloaded and built from source under MPL-2.0. The technology stack listed is Swift and Metal, with an AppKit-based workspace, Apple Vision models and Core ML conversions running locally, all on one platform-neutral engine that the site says will also power iPad and iPhone versions. In short, Redlamp's stated proposition is Lightroom's workflow made native to the Mac: a from-scratch Swift and Metal RAW editor with a familiar Develop module, architecture-level masking, serious scene-referred colour, its own GPU-first RAW pipeline, and no subscription, no cloud and no changes to your originals.
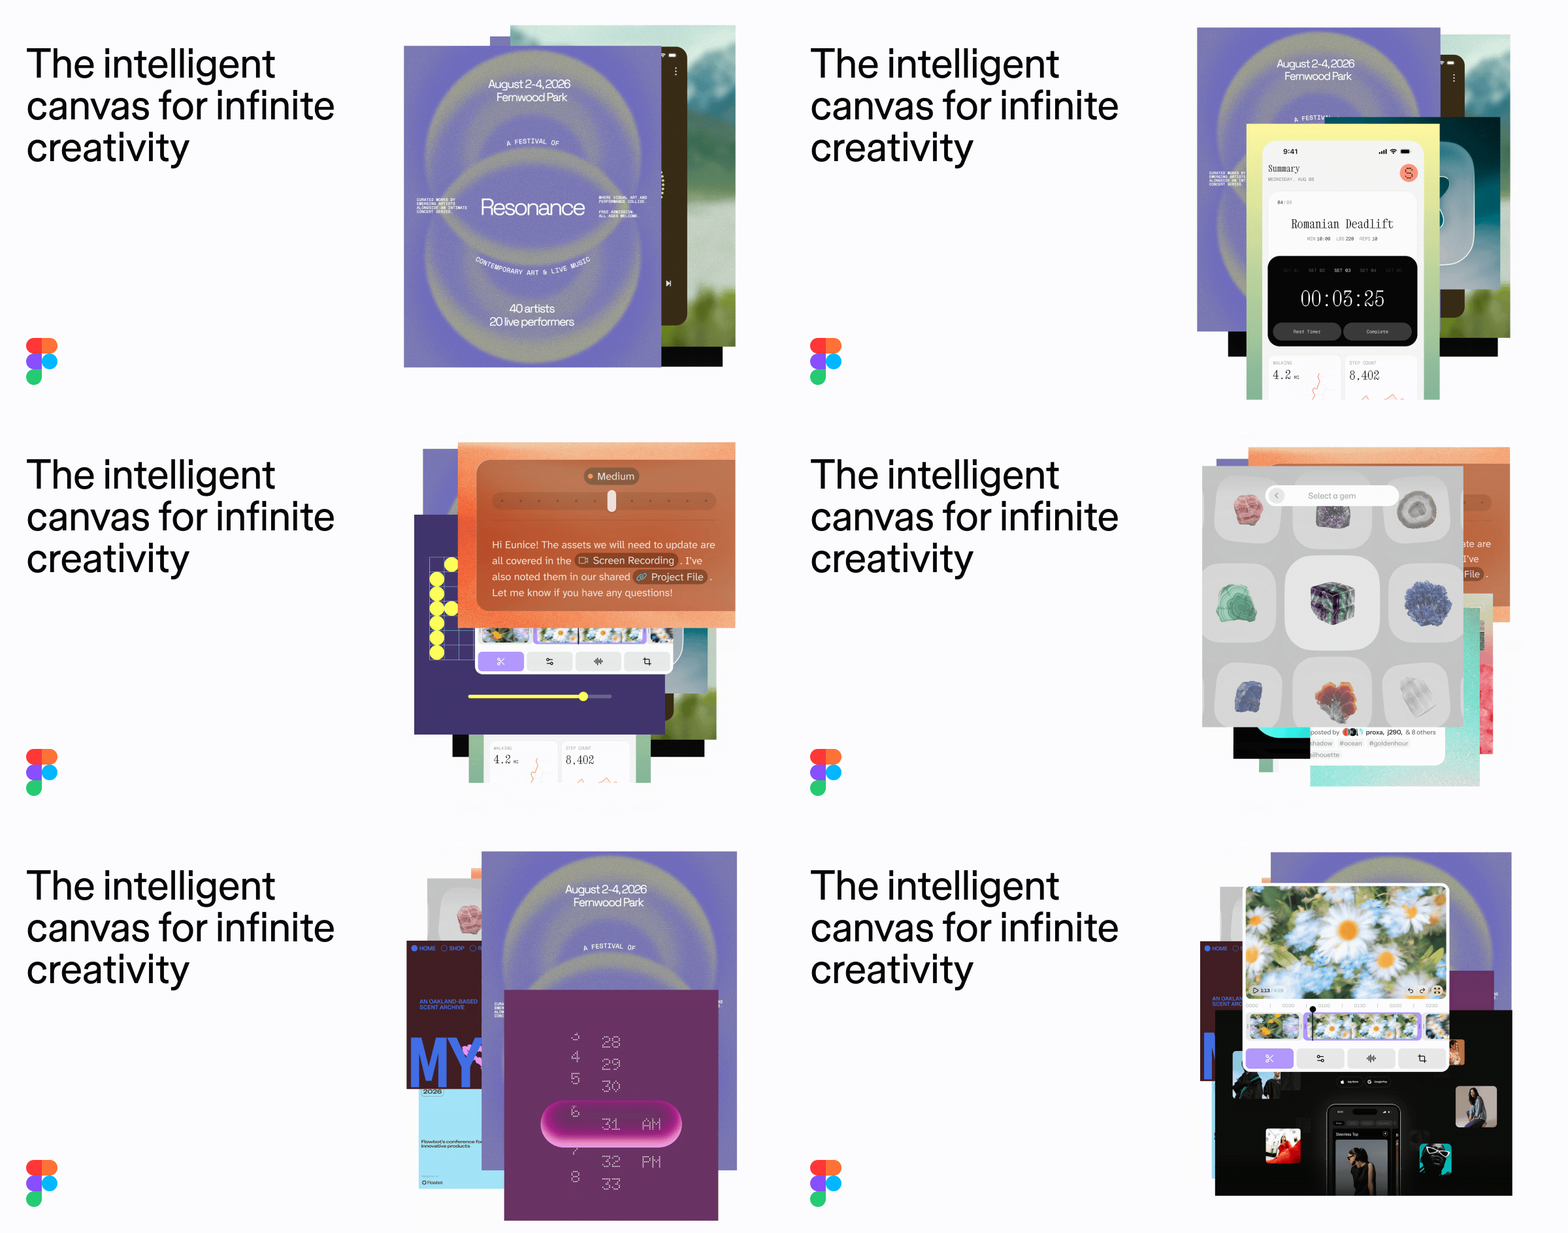
Figma Agent is an AI agent that lives directly on the Figma design canvas, allowing designers and product teams to prompt, edit, and prototype without ever leaving the canvas. Unlike tools that operate on flat images, Figma Agent works with your real components, variables, and team files, so the work it produces is connected to the same system your team already uses. Figma describes itself as the collaborative canvas for design, code, and AI—a single place where design, code, and AI come together so a whole team can go from first idea to shipped product, from concept to production, in one place. The challenge this addresses is familiar to any product team: design, feedback, and engineering context tend to live in scattered tools, and moving between them breaks momentum and loses detail. Figma positions the canvas as one workspace for the entire product development process, "made so your whole team can go from WIP to ship, together." Rather than exporting a design and pasting it into another assistant, or handing off static screens that ignore the underlying design system, teams can keep teammates and AI agents working in the same space with shared context. On Figma's AI-native canvas, the goal is to generate new ideas, refine them, and align—together—so that ideas no longer have to wait their turn and the flow from idea to review stays intact. Because teammates and agents share the same context, the handoff between exploration and review happens in the file rather than across disconnected tools. The core capability of Figma Agent is prompt-driven creation on the canvas. You can ask the agent to generate layout directions and explore multiple approaches quickly, then refine them. Because the agent operates on your real components and variables rather than flat images, the layouts it produces respect the building blocks your team already maintains, which reduces the cleanup work that typically follows AI-generated output. This makes early exploration faster while keeping the results closer to something production-ready, and it means the agent's output is grounded in the design context your team has already established. Figma Agent also handles bulk editing across screens. Instead of manually selecting and adjusting elements one screen at a time, you can apply changes across multiple screens in a single pass. This is especially useful for design systems work, where a small change—say to spacing, a variable, or a component property—can have wide-reaching effects. The agent can also turn comments into changes, converting feedback left on designs directly into edits, which shortens the loop between review and revision and keeps the conversation connected to the artifact being discussed. Turning comments into changes means review input becomes tangible updates in the same file, rather than a separate list of notes to interpret later. Beyond editing, Figma Agent supports prototyping from a prompt, so you can move from an idea to an interactive prototype without leaving the canvas. Figma frames the agent as a "built-in creative collaborator": you can ask Figma's agent to add motion to designs, document your design systems, implement feedback, and more. Adding motion helps communicate how an interface should feel, documenting design systems keeps that knowledge accessible, and implementing feedback turns review input into tangible updates—all through the agent rather than a separate workflow. The motion timeline and other technical tools described on the canvas support refining how designs behave, not just how they look. Figma Agent extends beyond the canvas through integrations. It can pull context from Notion, Slack, GitHub, and Linear via MCP, connecting design work to the documents, conversations, code, and issues that surround a product. You can also build your own plugins and shaders, extending what the agent and the canvas can do, and save repeatable workflows as skills your team runs with a "/" command. That last capability matters because it lets teams capture their own processes—like a recurring way of implementing a particular kind of feedback or documenting a component—and reuse them consistently. Pulling context from tools like GitHub and Linear keeps design decisions connected to the code and issues they relate to, while Notion and Slack context keeps the surrounding documentation and conversation in reach. The underlying approach is what Figma calls the AI-native canvas: teammates and AI agents work in the same space with shared context, rather than the agent being a separate chat window disconnected from the file. Design context stays connected to the codebase and to agents, so—as Figma puts it—"what you design is what gets shipped." Figma also emphasizes that you "start with design context" and "build with consistency," meaning the agent leans on existing components, variables, and files instead of generating isolated artifacts. The canvas is described as powerfully expressive and incredibly precise, offering the technical tools needed to dial in details—such as precise accessibility and precise padding—while the motion timeline and advanced effects support refining how designs behave. Additional canvas capabilities described in the content include glass depth, brush strokes applied to type, cursor vector editing, variable type, and type on a path. For users, the benefits center on staying in flow. Because prompt, edit, and prototype all happen on the canvas, there is less tool-switching and less context loss between idea, design, and review. Teams can generate and refine ideas together, incorporate feedback faster by turning comments into changes, and keep their output aligned with the real design system. The result Figma describes is a more transparent, open, and honest process: as Francisco Seiz, Senior Design Director at Code and Theory, notes, "Everyone is able to influence, inspire, and give input without ever leaving the design file." Concrete scenarios include generating several layout directions for a new screen and comparing them; applying a design-system change, such as a variable or spacing update, across many screens at once; turning review comments into edits so feedback is addressed in place; building a prototype from a prompt to explore interaction ideas; adding motion to a design to show how it should feel; and documenting a design system so it stays understandable. Teams can also create skills for recurring workflows and run them with a "/" command, and pull in context from Notion, Slack, GitHub, or Linear when a design task depends on documents, conversations, code, or issues. Designers can also turn to Figma's community templates—UI kits, websites, social media graphics, mobile apps, presentations, wireframes, illustrations, portfolios, web ads, and icons—as starting points alongside the agent's generated work. Figma Agent is aimed at design and product teams—designers, and the broader group Figma calls "your whole team"—who work on apps, websites, and products and want to move from WIP to ship together. It is relevant to organizations of significant scale: Figma states that 95% of the Fortune 500 uses Figma, based on data from March 2025, and its logos include Airbnb, Atlassian, Dropbox, Duolingo, GitHub, Mercado Libre, Microsoft, Netflix, Pentagram, Slack, Stripe, The New York Times, and Zoom. Documented integrations named for the agent include Notion, Slack, GitHub, and Linear via MCP. Pricing details are not specified in the available content. Figma Agent's primary value proposition is keeping prompt, edit, and prototype work on the same canvas as your real components, variables, and team files. By connecting teammates, AI agents, design context, and code in one place, it aims to help teams move fast in the right direction—from first idea to shipped product—without leaving the flow.
AI Room Makeover helps you preview changes in a photo of your real room before buying furniture, painting or remodeling. Upload a room photo, describe the change, and optionally add product or material reference images. Generate a visual preview of new furniture, wall colors, flooring or a room style while keeping the original space as close to the source photo as possible. A free tier is available, with optional one-time credit packs.
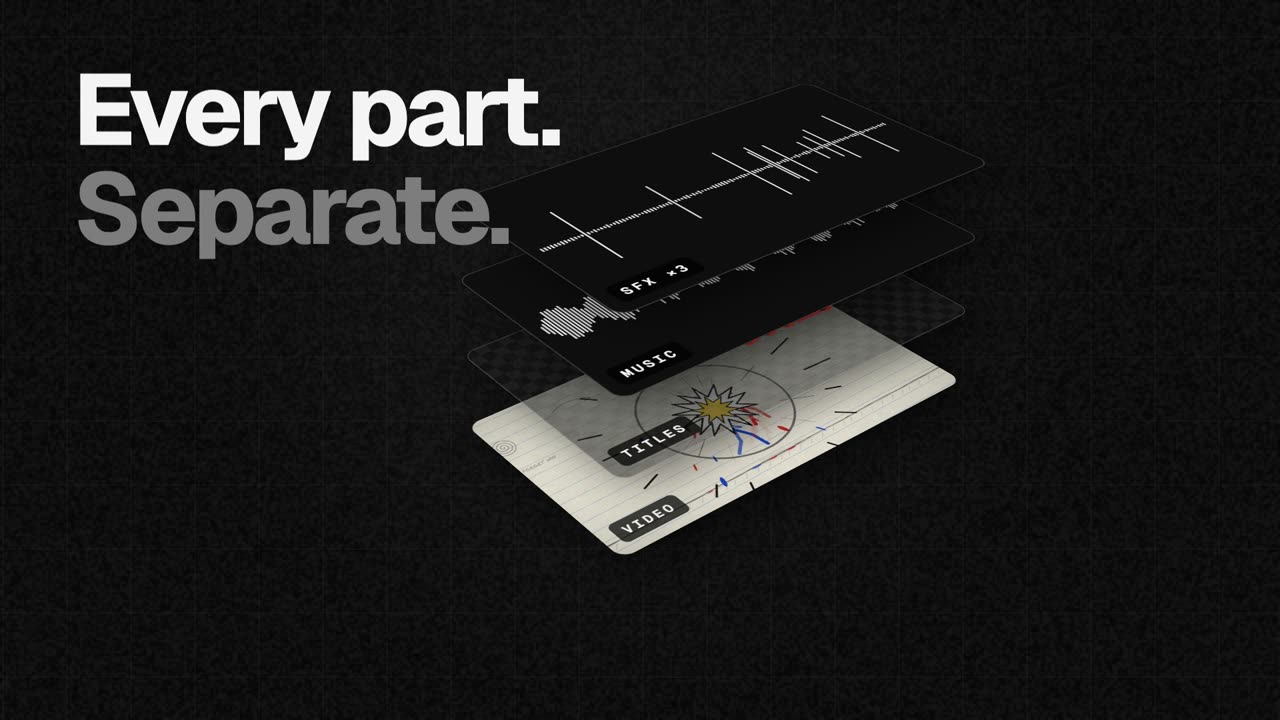
EasyCut is a free video editor that runs entirely in your browser and is built specifically to finish motion videos made by Claude. When Claude designs, animates and scores a video — its own motion, music and sound effects — EasyCut opens it as one project in which the video, the titles, the music and each individual sound effect sit on their own track, lined up and labelled. The tool is for anyone who wants the creative reach of an AI video generator but still needs a real editing timeline to trim scenes, swap music, add captions, adjust timing, add their own brand, and export the finished film in whatever shape a platform needs. The problem EasyCut addresses is that an AI-generated video normally arrives as one finished, flattened file. If you want a different music bed, a shorter title card, a quieter sound effect or a cut that lands half a second earlier, there is often no practical way to change just that element — the usual answer is to regenerate the whole video and hope the new version keeps everything else you liked. EasyCut's answer is to keep every part of the Claude-made video separate. Because each title, scene, image, sound and element is preserved on its own track, you can select anything and ask Claude to change just that part without rebuilding the whole video. That turns an AI video from a fixed output into a starting point you can actually edit. The editing core is a full timeline rather than a trimmed-down AI toy. EasyCut describes itself as a real editor with a magnetic timeline, frame-exact cuts, J/K/L keyboard controls, markers and undo for everything. You can cut, trim and split clips by dragging edges, split at the playhead, and reorder clips by dragging them, with transitions added in one click. Pauses can be removed in one go, or you can cut words by crossing them out directly in the transcript. Auto captions are generated word by word, written on your own computer, and can be saved out as SRT or VTT files for use elsewhere. Audio work is handled with the same level of control. Music can be fitted to the video's length, cut on the beat with its real ending, and there are free music and effects libraries built in, with ducking so music sits under voices automatically. You can record your screen, your camera, or both together with your voice, straight onto the timeline. A Layers panel lists every clip of a Claude video in one place, so you can find all the whooshes and mute or delete them at once, and speed ramps let you slow one moment down or speed it up with easing that moves smoothly in and out of the change. Visual and AI features are included as well. Colour looks, green screen, split screen, blur boxes, shapes and stickers are available to make footage look good, while voice clean-up, background removal and an AI voice all run on your device without uploading anything. Export covers MP4 up to 4K and 60 fps, produced as wide, tall and square versions in one go, plus GIF and audio-only exports. Projects save automatically in your browser as you work and can be moved anywhere as a single file, and a brand area keeps your logo, colours and fonts in one place for every video — a set Claude can use too. EasyCut's distinctive approach is how the Claude connection works. Setting it up takes about one minute, once. You add the EasyCut connector to Claude, and from then on Claude can open the videos it makes straight in EasyCut with every part on its own track. There are two routes. With Claude Desktop you download the EasyCut extension — a 170 KB .mcpb file for macOS and Windows — and press Install when Claude asks to install it, since Claude already has everything it needs to run it. With Claude Code you run one terminal command: claude mcp add easycut -- npx -y easycut-connector@latest. Then you open EasyCut, press Claude at the top, turn it on and choose Allow if the browser asks to let it reach apps on this device. If you are using claude.ai in the browser instead, you ask for the parts as downloads and open them from EasyCut's Claude panel. Claude Code needs Node.js 18 or newer. The practical benefit is that a finished AI video becomes a controllable edit rather than a fixed result: you trim a scene, mute a whoosh, drop in your own track or move the titles, and if you want something changed that only Claude can produce, you select one clip and ask for just that. Everything can then be exported in the shapes different platforms need. EasyCut is free with no trial, no watermark and no account, and nothing is uploaded: cutting, the AI features and the export all happen in your browser on your computer. The only downloads are the AI models, fetched once the first time you use a feature, and anything you choose from the free music and photo libraries. It is deliberately calm by design, with big buttons, plain words and tips everywhere, so there is nothing to learn first. Concrete workflows follow the three steps EasyCut describes. First, you ask Claude for a video — for example, a dynamic 40-second launch video for an app with bold type, smooth camera moves, great music and sound effects, opened in EasyCut. Second, every part lands on its own track: the video, the titles, the music and each sound effect open as one project, lined up, labelled and ready. Third, you finish it your way — trim a scene, mute a whoosh, drop in your own track, move the titles, or select one clip and ask Claude to change just that — and then export in every shape you need. EasyCut is not limited to Claude output either: it is a full editor, so you can add your own videos, photos and music, or record your screen and camera. EasyCut is made for computers; on a phone the screen is too small for a timeline, so it is not a mobile editing app. Browser support is broad but tiered: Google Chrome and Microsoft Edge do everything, including export, while Safari 16.4+ and Firefox 130+ can edit too. Its Claude integration is the headline connection, available through Claude Desktop and Claude Code, with a fallback for claude.ai in the browser. Pricing is simply free — no trial, no watermark and no account — and the site positions it as a finishing editor for AI video rather than a video generator, with the tagline that Claude makes it and you finish it. EasyCut's value proposition is narrow and clear: it is the finishing editor for AI video. Claude makes the whole video — motion, music, sound effects — and EasyCut opens every part on its own track so you can trim it, swap the music and export it, free, right in your browser, with your footage never leaving your computer.
Scumble is a free, open-source desktop editor built specifically for AI inpainting. Rather than moving between a masking tool, a generation workflow and a separate image editor, you select part of a picture, say what belongs there, and the result arrives as its own colour-matched layer. It is made for people who inpaint regularly — retouchers, photographers and AI image makers who already work with models such as FLUX 3, GPT Image or Nano Banana and want one place to run and refine those edits. Scumble works with your own ComfyUI instance or your own API keys, so generation stays on infrastructure you already control instead of a subscription service you do not. The project began as a weekend build. Its maker describes doing a lot of inpainting and repeating the same dance every time: build a mask here, run a workflow there, pull everything back into an image editor, fix the edges, and repeat. That loop is the problem Scumble addresses. Each step is individually reasonable, but together they force constant context switching, and the final blending work — matching an AI-generated patch to the lighting and colour of the surrounding photograph — is exactly the part that general-purpose tools handle clumsily. Scumble's answer is to make the inpainting result a first-class layer inside the editor, so the fiddly part of the process happens where you can see it. Selection is deliberately flexible. You can paint a mask by hand, point at an object in the picture, or simply type what it is, letting the editor work out where the selection should be. Whichever route you take, every result comes back as its own layer that is colour-matched to its surroundings, and the original image is never touched. That last detail matters: because the edit lives on a separate layer, an almost-right generation does not overwrite your base photograph. You keep the pixels you started with, and the AI output sits on top as something you can judge, adjust and combine rather than something that permanently replaces your file. Scumble does not lock you into one provider. It runs against your own ComfyUI setup — local, remote or Comfy Cloud — or against your own API keys for a range of models, including FLUX 3, FLUX.2, GPT Image, Nano Banana, Seedream, Qwen and Ideogram. The API path is handled with a privacy detail worth noting: only the area around your selection leaves your machine, and the answer comes back at full resolution. In practice that means you are not uploading the whole photograph to a third-party service just to change one region of it. Because it is your own ComfyUI or your own keys, you pay the model providers directly, and Scumble takes no cut. Prompting goes beyond a single text box. Boxes in the prompt let you draw where things should go and describe each box individually — a capability the maker lists for FLUX 3 Image and Ideogram 4 — so a single generation can place several described objects into specified regions of the frame. Reference images can be addressed by name inside the prompt as well, allowing instructions such as 'put their cup from @img1 on the sill'. Together these two features let you compose edits with a level of spatial and referential control that a plain inpainting prompt cannot express, while still keeping the workflow inside the same editor window rather than spread across multiple applications. Under the hood, Scumble can be driven not only by a person but by an agent. It ships an MCP server with 105 tools, which means Claude Code or any other MCP client can operate the editor directly. Combined with the layer-based output model, that is Scumble's defining approach: inpainting is treated as a normal editing operation that produces a discrete, colour-matched layer, rather than a one-shot generation you have to redo when it is not quite right. The editor also includes 46 film looks that apply as layers, along with retouch tools, so a generated patch can be graded and blended in the same environment it was created in, without exporting to a different application just to finish it. The practical benefit is time. As the maker puts it, colour-matched layers were possible in Photoshop or ComfyUI before, but in a much more cumbersome way; having it directly as a feature in the layer saves a great deal of that time. Commenters on the launch made the same point from the other direction, noting that the layer-based approach makes AI edits feel more like ordinary photo editing instead of forcing a full regeneration of the image. PSD export extends that logic further: if an AI edit is almost right, you can finish it in another editor rather than generating again. Scumble also keeps accounts out of the equation — no account, no telemetry, and API keys stored in the system's credential store. Scumble fits workflows where a photograph needs a targeted change rather than a wholesale reimagining. A retoucher can paint a mask, replace an object and blend the result via a colour-matched layer and one of the 46 film looks before exporting a PSD. A masked region can be regenerated through an API with only the area around the selection leaving the machine, which suits work on images that should not be uploaded in full. Teams building something like virtual try-on, where garment print and texture must stay clean at mask edges, can keep the AI output on its own layer. And with the MCP server, a developer can let an MCP client such as Claude Code drive the editor programmatically. Scumble is aimed at anyone who inpaints often enough to want a dedicated tool: photographers, retouchers and AI image makers already comfortable with ComfyUI or with provider API keys. Integration is broad on the model side — ComfyUI (local, remote or Comfy Cloud) and keys for FLUX 3, FLUX.2, GPT Image, Nano Banana, Seedream, Qwen and Ideogram and more — while output supports PSD, ORA and TIFF export and pictures of 15,000 pixels and more. On pricing it is free and open source under GPL-3.0. Availability is honest about its stage: version 0.1.x and moving fast, with Windows first — a Microsoft Store listing signed by Microsoft, a GitHub installer and a portable zip — Linux builds coming out of CI, Mac planned, and not every API provider tested live. Scumble's value proposition is narrow and clear: it is a free, open-source desktop editor that treats AI inpainting as a layer-based editing task, running on your own ComfyUI or your own API keys. By returning every generation as a colour-matched layer, keeping the original untouched, sending only the selected area when going through an API, and supporting PSD, ORA and TIFF export, it removes the mask-run-edit-fix loop that makes inpainting tedious. Add a 105-tool MCP server and it becomes something an agent can drive too. For anyone who inpaints regularly, it is an attempt to make the process feel like ordinary photo editing.